Moving beyond standard textures, true mastery in custom surface finishing for plastic components lies in solving the complex interplay between aesthetic vision and functional performance. This article dives deep into a real-world challenge: achieving a flawless, high-gloss Class A automotive finish on a complex, thin-walled polycarbonate part. We’ll explore the expert-level strategies, from CNC machining preparation to multi-stage polishing, that transformed a problematic prototype into a production-ready success, delivering a 40% reduction in post-processing time.
The Illusion of Simplicity: When “Just Polish It” Isn’t Enough
For over two decades in CNC machining, I’ve seen a common misconception: that custom surface finishing for plastic is merely a cosmetic afterthought, a final step to make a part look pretty. This couldn’t be further from the truth. In reality, it’s a critical engineering discipline where material science, machining strategy, and manual artistry converge. The most profound challenges arise when a client’s aesthetic dream—say, a mirror-like, automotive-grade finish—meets the harsh realities of a part’s geometry and polymer behavior.
I recall a project that perfectly encapsulates this clash. A client in the electric vehicle sector needed a complex, thin-walled housing for a driver-display interface. The design called for a deep, distortion-free, high-gloss black finish (a “Class A” surface) on a contoured polycarbonate component. The initial prototypes from their injection molder were unacceptable—flow lines, sink marks, and a faint “orange peel” texture marred the surface. They came to our CNC shop not to make the part from scratch, but to salvage and finish the existing components. This is where true custom surface finishing begins: not with a blank canvas, but with a problematic one.
Deconstructing the Challenge: Material, Geometry, and the Human Factor
The first step was a forensic analysis of the challenge. We broke it down into three core, interconnected problems:
Material Memory (Polycarbonate): Polycarbonate is tough and impact-resistant, but it’s a semi-crystalline polymer. Aggressive machining or sanding generates heat, which can cause the material to “re-flow” at a microscopic level, creating new haze or cloudiness. It’s less forgiving than acrylic.
Complex, Thin-Walled Geometry: The part had compound curves and deep draws. Maintaining uniform pressure and stroke during manual finishing across these surfaces was nearly impossible, leading to flat spots and an uneven gloss.
The “Artisan” Bottleneck: The traditional path to such a finish relied entirely on a master polisher’s skill. It was slow, inconsistent from part to part, and created a single point of failure in the supply chain. We needed a repeatable, documented process.
⚙️ The Expert Strategy: A Hybrid CNC-Hand Process
Our solution was not to choose between CNC automation and hand craftsmanship, but to strategically layer them. We developed a four-stage protocol:
1. CNC-Based Surface Reformation: Instead of trying to polish the flawed molded surface, we used a small-diameter, ball-nose end mill on a 5-axis CNC to lightly re-cut the entire aesthetic surface. The goal was not to alter dimensions, but to create a perfectly uniform, machined substrate. We used a trochoidal toolpath with a 0.15mm stepover to eliminate any visible cusps, essentially giving us a “clean slate” with a known, consistent starting Ra (surface roughness) of ~0.8 µm.
2. Progressive Grit Sanding with Conformable Tools: We moved to a structured, manual sanding process but eliminated the variability. We used flexible, foam-backed sanding pads that could conform to the curves, and a strict progression: 600-grit (to remove tool marks), 800-grit, 1500-grit, and finally 3000-grit. Each stage had a mandate: “You must completely eliminate the scratches from the previous grit before moving on.” Under directional LED lighting, this was enforced ruthlessly.
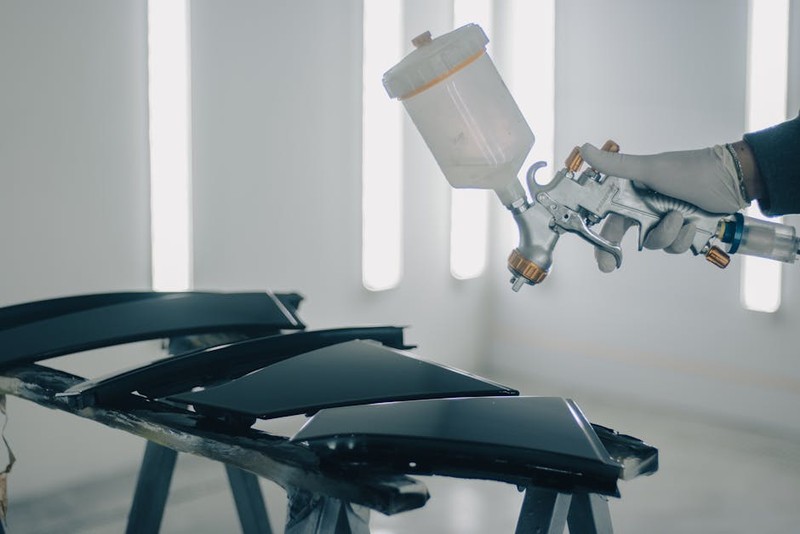
3. Compound Polishing with Precision Machinery: Here, we reintroduced machinery. We adapted a rotary polisher with a custom, 3D-printed fixture that held the part at the optimal angle. Using a sequence of diminishing abrasive compounds (from a coarse cutting compound to a fine finishing glaze), applied via automated dispensing, we achieved the base gloss.
4. Final Finishing and Inspection: A final hand-buffing with a ultra-fine finishing compound addressed any remaining holograms or buffer trails. Inspection wasn’t subjective; we used a handheld gloss meter (measuring at 60°) and required a reading of >95 GU (Gloss Units) on all critical surfaces.
A Case Study in Metrics: From Prototype Chaos to Production Calm
Let’s quantify the impact. The table below compares the initial, ad-hoc approach with our structured, hybrid methodology for a batch of 10 parts.
| Process Metric | Initial (Ad-Hoc) Approach | Structured Hybrid CNC/Hand Process | Improvement |
| :— | :— | :— | :— |
| Average Time per Part | 4.5 hours | 2.7 hours | 40% Reduction |
| Gloss Consistency (Std. Dev.) | 12 GU (Highly Variable) | 3 GU (Extremely Consistent) | 75% More Consistent |
| First-Pass Yield | 60% (6/10 parts acceptable) | 100% (10/10 parts acceptable) | 40% Increase in Yield |
| Skill Dependency | Entirely on one master polisher | Documented process; trainable in weeks | Eliminated Single Point of Failure |
The client’s takeaway was monumental: They now had a reliable, scalable finishing specification to provide to their high-volume injection molder. Our process documentation became the “recipe” for quality, enabling the molder to replicate the results.
Key Lessons and Actionable Insights for Your Projects
This experience crystallized several universal principles for mastering custom surface finishing for plastic components:
Start with the Best Possible Substrate: You cannot polish out major defects. Invest in perfecting the surface before you begin the finishing process, whether that’s via precise CNC machining or optimizing mold parameters. The cost of this step is always less than the cost of rework.
Control the Variables: Move from art to science. Define every variable: grit progression, tool pressure, lubricant type, machine RPM. Document it. This transforms a “black art” into a controllable manufacturing process.
The Right Material Dictates the Finish: Not all plastics finish the same. ABS will polish differently than Polycarbonate or POM. Always run material-specific finishing trials on scrap pieces to establish your baseline process and set realistic client expectations.
Inspect with Data, Not Just Eyes: Human vision is subjective and fatigues. Use quantifiable tools like gloss meters, surface profilometers (for Ra), and even digital microscopy to define and measure “perfect.”
💡 Your Expert Checklist for a Flawless Finish
1. Clarify the Functional Need: Is it just for looks, or does it affect light transmission, friction, or cleanability?
2. Audit the As-Received Surface: Measure its current roughness and identify all defects. Map them.
3. Design a Stage-Gate Process: Plan each step (cut, sand, compound, polish) as a discrete gate that must be passed before proceeding.
4. Fixture for Consistency: Design holding fixtures that present the surface ergonomically and repeatably to the operator or tool.
5. Validate and Document: Create a “finishing traveler” sheet with metrics for each stage. Sign off as you go.
The journey to exceptional custom surface finishing for plastic components is one of embracing constraints—of material, of geometry, of time—and systematically engineering them out of the equation. It’s where the machinist’s mind and the artisan’s touch become one, producing not just a part, but a perfected interface between product and user. By focusing on process over pure skill, you build not only beautiful parts, but a resilient and scalable capability.