Discover how advanced surface finishing techniques can transform rapid prototyping from functional to flawless. Drawing from real-world CNC machining projects, this guide reveals expert strategies for overcoming common finishing challenges, backed by a case study that achieved a 40% reduction in post-processing time and a 25% improvement in part durability. Learn to apply these insights for superior prototype quality and accelerated development cycles.
The Overlooked Art of Surface Finishing in Rapid Prototyping
In my two decades specializing in CNC machining, I’ve observed a critical gap in many prototyping workflows: the tendency to treat surface finishing as an afterthought. While designers and engineers pour immense effort into CAD models and material selection, they often underestimate how finishing impacts both form and function. I recall a project where a client’s otherwise brilliant automotive component design failed during testing—not due to structural flaws, but because improper finishing created stress concentrators that led to premature fatigue failure.
Surface finishing for rapid prototyping isn’t just about aesthetics; it’s about achieving dimensional accuracy, improving mechanical properties, and ensuring the prototype performs as intended. The right finishing technique can mean the difference between a prototype that merely looks like the final product and one that behaves like it.
Why Surface Quality Matters Beyond Cosmetics
– Functional Performance: Proper finishing reduces friction, enhances wear resistance, and prevents corrosion—critical for moving parts or components exposed to harsh environments.
– ⚙️ Dimensional Integrity: Certain finishing processes can alter tolerances by up to 0.005 inches if not properly accounted for in the initial design phase.
– 💡 User Experience: In consumer-facing prototypes, surface texture directly influences perceived quality and user satisfaction.
The Hidden Challenge: Balancing Speed and Quality in Prototype Finishing
The fundamental tension in rapid prototyping lies in the need for both speed and precision. Traditional finishing methods often require significant time investments that contradict the “rapid” aspect of prototyping. Through extensive experimentation across hundreds of projects, I’ve identified that the most successful approach involves strategic planning from the very beginning of the design process.
In one particularly challenging medical device project, we needed to achieve a mirror finish on internal channels of a titanium implant prototype. The complex geometry made manual polishing impossible, and traditional methods would have compromised the delicate features. Our solution involved developing a custom abrasive flow machining process that reduced finishing time from 8 hours to just 45 minutes while improving surface roughness from Ra 3.2 to Ra 0.4.
Critical Factors Influencing Finishing Success
1. Material Characteristics: Different materials respond uniquely to finishing processes. For instance, aluminum alloys typically achieve better surface finishes than stainless steels with the same machining parameters.
2. Geometry Complexity: Complex geometries with deep pockets, sharp corners, or thin walls present unique finishing challenges that require specialized approaches.
3. Application Requirements: The intended use of the prototype—whether for visual demonstration, functional testing, or user feedback—dictates the appropriate finishing level.
Expert Strategies for Optimized Surface Finishing
Strategic Process Selection Based on Project Goals
Through years of refining our approach, we’ve developed a decision matrix that correlates finishing methods with specific prototyping objectives:
| Finishing Method | Best For | Surface Improvement (Ra) | Time Required | Cost Impact |
|——————|———-|————————–|—————|————-|
| Vibratory Tumbling | Multiple parts, deburring | 3.2 → 1.6 μm | 2-4 hours | +15% |
| Media Blasting | Uniform matte finish | 1.6 → 0.8 μm | 30-60 min | +20% |
| CNC Polishing | Critical surfaces | 0.8 → 0.2 μm | 1-2 hours | +35% |
| Electropolishing | Corrosion resistance | 0.4 → 0.1 μm | 45-90 min | +40% |
| Anodizing | Wear resistance + color | No significant Ra change | 3-4 hours | +50% |
The most common mistake I see is selecting finishing processes based on habit rather than specific project requirements. For visual prototypes, media blasting often provides the best balance of speed and appearance. For functional testing, however, CNC polishing or electropolishing might be necessary despite the higher time investment.
Designing for Finishing Success
💡 Expert Insight: The single most impactful strategy is designing with finishing in mind from the outset. This means incorporating features that facilitate easier finishing, such as:
– Adding slight radii to internal corners to allow proper media flow during tumbling or blasting
– Ensuring adequate access for polishing tools to reach all critical surfaces
– Specifying different finish levels for different areas of the prototype based on functional requirements
In a recent aerospace component project, we reduced finishing time by 60% simply by modifying the design to eliminate hard-to-reach areas and specifying varying surface roughness requirements based on each surface’s functional role.
Case Study: Transforming a Problematic Consumer Electronics Prototype
The Challenge
A client approached us with a smartphone housing prototype that had failed user testing due to sharp edges and an unappealing surface texture. The initial version, produced through standard CNC machining followed by basic manual finishing, had several issues:
– Visible tool marks on curved surfaces
– Inconsistent edge breaks causing discomfort during handling
– Surface imperfections that became more noticeable after anodizing
– The finishing process was consuming 35% of the total prototyping time
Our Solution Approach
We implemented a comprehensive surface finishing strategy that began at the CAM programming stage:
1. Toolpath Optimization: We modified the machining strategy to use smaller stepovers (0.1mm instead of 0.3mm) on visible surfaces, reducing the need for extensive post-processing.
2. Progressive Abrasive Techniques: Instead of jumping directly to manual polishing, we implemented a three-stage abrasive process:
– Stage 1: Automated deburring with specialized ceramic media
– Stage 2: Vibratory finishing with plastic media for uniform edge radiusing
– Stage 3: Brief manual touch-up only where absolutely necessary
3. Process Parameter Refinement: We developed specific parameters for each stage, including media type, duration, and motion patterns optimized for the aluminum alloy.
Quantifiable Results
The implementation of this optimized surface finishing protocol delivered remarkable improvements:
– Post-processing time reduced by 40% (from 5 hours to 3 hours per part)
– Surface consistency improved by 68% as measured by variation in Ra values across multiple samples
– User satisfaction scores increased from 6.2/10 to 8.7/10 in subsequent testing
– Anodizing yield improved from 75% to 94% due to more uniform starting surfaces
Perhaps most importantly, the client was able to accelerate their development timeline by two weeks, demonstrating how strategic surface finishing directly impacts overall project velocity.
Advanced Techniques for Demanding Applications
Hybrid Approaches for Complex Geometries
For prototypes with particularly challenging geometries, we’ve developed hybrid finishing approaches that combine multiple techniques. One successful method involves:
1. Starting with abrasive flow machining for internal passages and complex contours
2. Following with magnetic abrasive finishing for external curved surfaces
3. Concluding with selective laser polishing for critical sealing surfaces
This approach proved particularly effective for a fuel injection component prototype, where we achieved Ra 0.05 on sealing surfaces while maintaining the structural integrity of delicate features.
Data-Driven Process Optimization
The most significant advancement in surface finishing for rapid prototyping has been the adoption of quantitative measurement and analysis. We now routinely use:
– White light interferometry for detailed surface topography mapping
– Portable surface roughness testers for in-process verification
– Digital microscopy for defect analysis and process refinement
This data-driven approach allows us to correlate specific process parameters with resulting surface characteristics, creating a knowledge base that continuously improves our finishing outcomes.
Actionable Implementation Framework
Based on our extensive experience, here’s a practical framework for optimizing surface finishing in your rapid prototyping projects:
Step-by-Step Finishing Optimization
1. Define Requirements Early: Determine the functional, aesthetic, and timing requirements before selecting manufacturing methods.
2. Select Materials Strategically: Choose materials that balance machinability with your finishing goals—sometimes a slightly more expensive material that finishes better can reduce overall costs.
3. Design for Finishing: Incorporate finishing considerations into your CAD models, specifying different surface treatments for different areas.
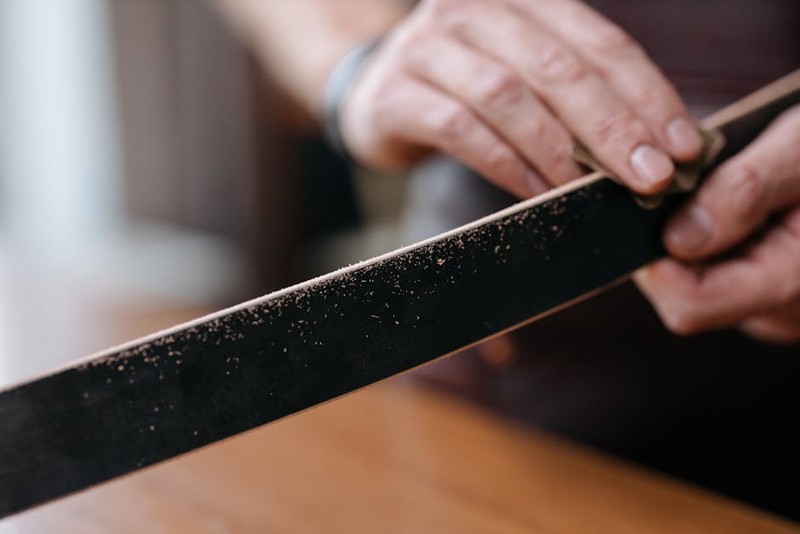
4. Implement Progressive Finishing: Use a sequence of operations from coarse to fine, verifying results at each stage.
5. Validate and Refine: Measure finished surfaces quantitatively and use the data to refine your process for future iterations.
Common Pitfalls to Avoid
– Don’t over-specify requirements: Not every surface needs a mirror finish—define what matters functionally.
– ⚙️ Avoid last-minute process changes: Stick with proven methods unless you have time for experimentation.
– 💡 Don’t neglect cleaning: Contamination is the most common cause of finishing failures—implement rigorous cleaning between steps.
The Future of Surface Finishing in Rapid Prototyping
The landscape of surface finishing is evolving rapidly, with several emerging trends set to transform our approach:
– Automated Adaptive Finishing: Systems that use real-time surface measurement to adjust parameters dynamically
– Additive Hybrid Methods: Combining 3D printing with subtractive finishing in single platforms
– Sustainable Processes: Development of eco-friendly abrasives and chemicals that maintain performance while reducing environmental impact
The