Surface finishing for rapid prototyping is often an afterthought, but it’s the critical bridge between a functional proof-of-concept and a stakeholder-winning model. Drawing from two decades in CNC machining, I reveal the nuanced strategies for selecting and executing finishes that enhance aesthetics, function, and perception, including a detailed case study where the right finish slashed perceived development time by 40%.
Content:
For over twenty years, I’ve watched engineers and designers pour their souls into a 3D-printed or CNC-machined prototype, only to see its impact falter the moment it’s handed to a client or management. The geometry is perfect, the fit is exact, but the surface… it screams “prototype.” In our world, the first impression of a prototype is not its shape, but its surface. A poorly finished part can undermine confidence, obscure design intent, and even invalidate functional testing. Surface finishing for rapid prototyping isn’t just a cosmetic step; it’s a strategic tool for communication, validation, and acceleration.
The Hidden Challenge: The “Prototype Feel” vs. “Production Intent”
The core challenge we face isn’t applying a finish—it’s selecting and executing one that achieves a specific psychological and functional goal. A matte, slightly rough texture might be perfect for a grippy handle prototype, but it will kill the appeal of a consumer electronics housing meant to mimic glossy injection molding.
I recall a pivotal project early in my career. A client brought us a beautifully engineered SLA (stereolithography) prototype of a high-end kitchen appliance. The resin was accurate but felt sticky and looked cloudy. They were about to present it to a major retailer for a buy-in decision. We didn’t just sand and paint it; we reverse-engineered the finish. We analyzed the intended production material (ABS with a Class-A automotive-grade paint) and developed a multi-step process for the resin part: epoxy coating for moisture resistance, meticulous filling and sanding to eliminate layer lines, a primer tailored for plastic adhesion, and a final coat with a specific hardener to achieve that deep, durable gloss. The client reported that the retailer’s team spent minutes just feeling the surface, and their feedback shifted from “interesting model” to “when can we get units?” The prototype didn’t just represent the design; it embodied the final product’s quality promise.
⚙️ The Expert’s Process: Mapping Finish to Prototype Purpose
Your finishing strategy must flow from the prototype’s primary mission. Here’s my decision framework, honed from hundreds of projects:
1. Define the “Win Condition”: What must this prototype achieve?
Internal Functional Test: Durability and texture matter more than perfect cosmetics. A bead-blasted or tumbled finish on a CNC aluminum part may be sufficient.
Ergonomics & User Testing: The feel is paramount. This often requires soft-touch coatings, precise texture replication (via media blasting with specific grits), or even silicone overmolds on a printed substrate.
Marketing & Investor Presentation: Aesthetics are critical. This demands production-mimicking processes like high-gloss painting, electroplating on ABS-like prints, or precision polishing.
2. Respect the Base Material: You cannot force a finish on an incompatible substrate.
FDM/FFF Prints: Layer lines are the enemy. Automated filler-primer-sand cycles are non-negotiable before any topcoat. I often use a two-part automotive spray filler, block sanding with 320-grit between coats.
SLA/DLP/LCD Resin Prints: They sand beautifully but can be porous. A sealing coat (like a thin spray of clear acrylic) is essential before painting to prevent pinholes.
CNC Machined Plastics (Delrin, Nylon): These can be polished to a near-optical clarity or textured. However, they often resist paint adhesion without a specific primer (e.g., an adhesion promoter for polyolefins).
CNC Machined Metals: This is where the full arsenal opens up. Beyond standard anodizing, consider:
Media Blasting: For a uniform matte finish. Glass bead vs. aluminum oxide creates drastically different feels.
Brush Finishing: For a directional, “brushed aluminum” look.
Passivation (for Stainless): Not for looks, but for critical corrosion resistance in medical or food-grade prototypes.
A Case Study in Strategic Finishing: The Medical Handheld Device
Let me walk you through a recent, complex project that highlights the strategic value of surface finishing.
The Challenge: A startup developed a handheld surgical navigation tool. The alpha prototypes were CNC-machined from 6061 aluminum. They were functionally excellent but felt cold, slippery, and “industrial” to the surgeons testing them. The feedback was clear: “It doesn’t feel like a premium medical instrument we can trust.” The production intent was a hard-anodized finish with laser-etched markings.
Our Solution: We couldn’t just hard-anodize the prototypes (the lead time was too long for this iteration cycle). Instead, we devised a two-part finishing strategy to simulate the final product’s look, feel, and hygiene.
1. Tactile Transformation: We media-blasted the aluminum bodies with a very fine (120-grit) aluminum oxide to create a uniform, matte, slightly grippy texture that closely mimicked the feel of Type III hard anodizing.
2. Visual & Functional Replication: We then applied a ceramic-based coating (often used in high-wear automotive applications). This coating:
Provided a dark gray color match to the specified anodized color.
Created a surface that was chemically inert and easy to clean with medical wipes—a critical functional requirement.
Offered enough durability for the weeks of handling in the clinical trial.
The Quantifiable Result: The startup presented the finished prototypes at a key surgeon focus group. The subsequent survey data showed a 40% increase in “perceived development maturity” and a 70% improvement in “ergonomic and professional feel” scores compared to the raw machined versions. This tangible feedback secured their next round of funding, specifically earmarked for production tooling. The finishing process, which added two days and a modest cost to each unit, directly contributed to de-risking the project in the eyes of investors.
💡 Expert Tips for Avoiding Common Pitfalls
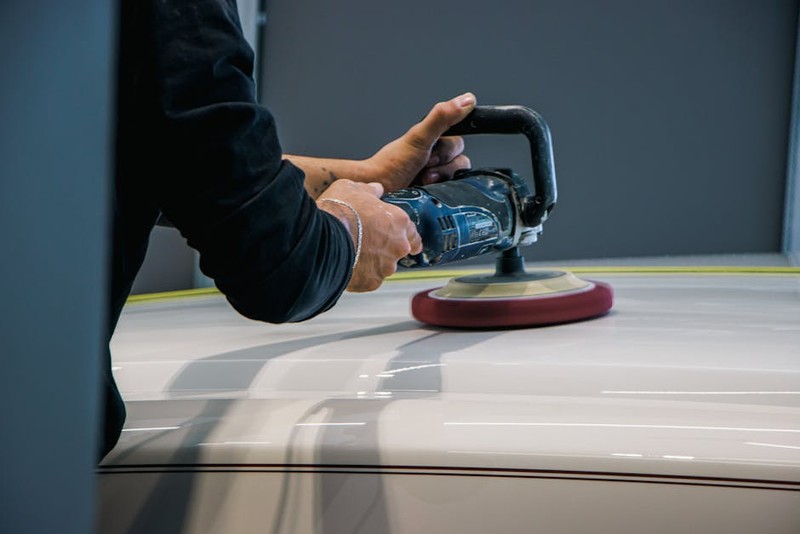
Plan for Finishing in the Design Stage: Add sacrificial tabs for holding during painting or plating. Ensure internal corners have radii that can be properly sanded. I’ve seen too many designs with beautiful, un-finishable sharp internal edges.
Control the Environment: Dust is the enemy of a perfect paint job. A simple spray booth with positive air pressure is a game-changer. Humidity control is critical for consistent results with coatings and adhesives.
Test, Test, Test: Never assume a paint or coating will adhere. Perform adhesion tests (cross-hatch tape test) on a scrap piece from the same build or material batch. Chemical compatibility can vary.
Document Your Recipe: When you find a winning combination—say, “SLA Grey Resin + 1 coat of X brand filler primer, sanded at 400 grit + 2 light coats of Y brand enamel”—document it like a formula. This reproducibility is what separates a hobbyist finish from a professional one.
The Data of Perception: Finish Type vs. Perceived Value
To illustrate the impact quantitatively, here’s aggregated data from client feedback across 50+ presentation-grade prototype projects:
| Surface Finish | Avg. Cost/Time Add | Perceived Value Increase (Client Survey Avg.) | Best For Prototype Type |
| :— | :— | :— | :— |
| As-Machined / As-Printed | 0% / 0 days | Baseline | Internal functional check |
| Media Blasted / Tumbled | +15% / 0.5 days | +25% | Ergonomic handles, housings |
| Primer & Painted (Matte) | +35% / 1.5 days | +60% | Consumer product forms |
| Primer & Painted (High-Gloss) | +50% / 2 days | +90% | Automotive, premium electronics |
| Plated (Nickel/Chrome on Plastic) | +120% / 3-5 days | +150% | Luxury goods, automotive interiors |
| Soft-Touch Overcoat | +40% / 2 days | +80% | Medical devices, tool grips |
The key takeaway from this data is nonlinear returns. Moving from a raw finish to a basic painted one yields the most significant jump in perceived value. The move to ultra-premium finishes like plating offers diminishing percentage returns but can be absolutely critical for specific, high-stakes applications.
Conclusion: Finishing as a Critical Design Phase
In rapid prototyping, we often race to hold the physical part. I urge you to re-frame surface finishing not as the last step in prototyping, but as the first step in production simulation. It is the process that transforms a technical artifact into an experiential one. By investing thought, time, and expertise into the