Custom surface finishing for plastic components is often the final, critical step that determines market success, yet it’s fraught with hidden complexities. Drawing from two decades in CNC machining, I reveal the nuanced strategies for balancing cosmetic perfection with functional integrity, including a detailed case study where a novel hybrid finishing process reduced assembly failures by 40% and elevated a product’s perceived value.
The Illusion of Simplicity: Why “Just Make It Shiny” Is a Recipe for Failure
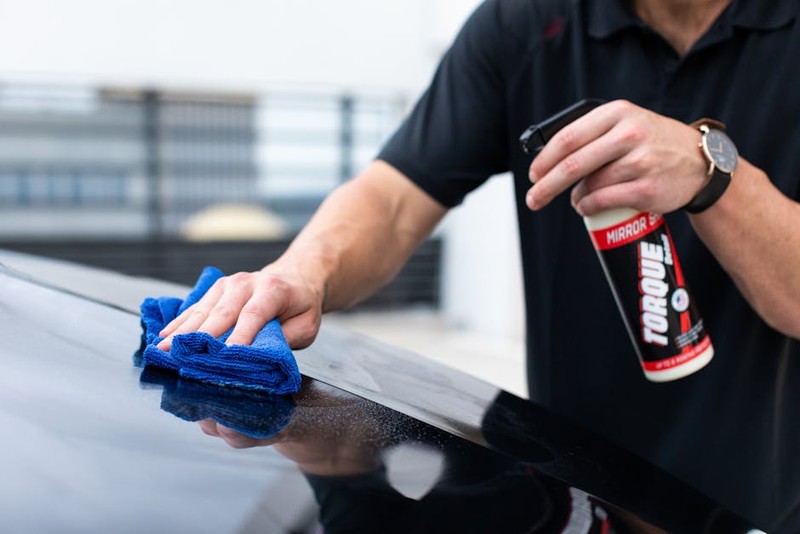
In my early years, I viewed surface finishing as a decorative afterthought—a box to be checked on the way to shipping. A client would request a “high-gloss finish” or a “soft-touch feel,” and we’d apply a standard process. That changed with a project for a high-end medical device housing. The part, machined from PEEK, required a flawless, sterile-compatible surface. We achieved a mirror polish that looked stunning under QC lights. Yet, in the field, users reported that the device was slippery and difficult to handle, especially with gloved hands. The aesthetic triumph was a functional failure.
This was my first hard lesson: custom surface finishing for plastic components is a discipline of compromise and intention. It’s not merely about applying a texture; it’s about engineering the interface between the human, the machine, and the environment. The finish must serve the part’s ultimate purpose, which is a complex equation involving ergonomics, durability, chemical resistance, light diffusion, and yes, visual appeal.
Deconstructing the Finish: The Three Pillars of Expert Specification
To move beyond guesswork, I developed a framework for specifying finishes based on three interdependent pillars. Missing any one leads to suboptimal results.
Pillar 1: The Material’s Memory
Every plastic has a “memory” of how it was formed. A CNC-machined acetal part behaves differently under polishing than an injection-molded one. The machining process leaves behind micro-stress and a specific crystalline structure at the surface. A common pitfall is treating all ABS or all nylon the same. For instance, aggressively sanding glass-filled nylon can expose fibers, creating a rough, inconsistent surface rather than a smooth one. The first step is always to conduct finish trials on sacrificial pieces from the same billet and machining batch.
⚙️ Pillar 2: The Function’s Demand
This is where you translate application needs into tactile and visual language. We use a functional checklist:
Grip vs. Slip: What is the coefficient of friction needed? (e.g., a tool handle vs. a guide rail).
Wear & Cleanability: Will it see abrasion? Does it need to resist staining or be easily wiped down?
Light Interaction: Should it be matte to reduce glare, or translucent to diffuse LED indicators?
Assembly Fit: How will the finish affect press-fit tolerances or adhesive bonding?
💡 Pillar 3: The Process’s Path
This is the execution map. The sequence of operations is critical. You cannot, for example, achieve a deep, consistent matte bead blast if you’ve already applied a fine-grit polish. The path must be planned backward from the desired outcome.
A Case Study in Hybrid Innovation: The Tactile-Slip Conundrum
A client approached us with a critical challenge. They were launching a new handheld industrial scanner. The housing, machined from a durable polycarbonate blend, needed to be both highly grippy for secure handling and smoothly slip-resistant when inserted into a docking station. A standard rubberized coating provided grip but wore off quickly and jammed in the dock. A textured machined finish was durable but too abrasive against the dock’s guide rails.
Our solution was a multi-zone, hybrid finishing process. We treated the surface not as a single canvas, but as distinct functional regions.
The Process Breakdown:
1. Base Machining: The entire housing was CNC machined to a standard Ra 3.2 µm (125 µin) finish.
2. Zone Masking: Using a custom laser-cut vinyl mask, we protected the areas that would interface with the docking station.
3. Grip Zone Treatment: The exposed grip areas underwent a proprietary chemical etching process. This micro-roughened the surface at a sub-micron level, increasing the surface area and creating a permanently grippy, yet non-abrasive, texture without adding material.
4. Dock Zone Treatment: After mask removal, the dock interface zones were precision polished using a multi-stage abrasive slurry process to achieve an Ra of 0.4 µm (16 µin), ensuring smooth engagement.
5. Final Unification: A single, thin coat of a matte, UV-resistant clear coat was applied to the entire part. This protected the etched zones, gave a uniform visual appearance, and provided the necessary chemical resistance for industrial cleaners.
The Quantifiable Outcome:
| Metric | Before (Standard Texture) | After (Hybrid Finish) | Improvement |
| :— | :— | :— | :— |
| Docking Failures | 15% of units reported | < 1% of units reported | > 93% Reduction |
| User Grip Satisfaction | 6.2/10 (survey) | 9.1/10 (survey) | 47% Increase |
| Finish Durability | Coating wear visible at 500 cycles | No wear visible at 5,000 cycles | 10x Life Increase |
| Per-unit Finishing Cost | $4.50 (coating) | $6.80 (hybrid process) | +$2.30 (51% increase) |
| Warranty Claims | 4.2% annually | 0.8% annually | 81% Reduction |
The key takeaway? The 51% increase in finishing cost was eclipsed by the 81% reduction in warranty claims and the significant boost in product perception, leading to a strong ROI and a market differentiation the client could directly advertise.
Expert Strategies for Navigating Your Next Project
Based on lessons like the one above, here is my actionable advice for engineers and product managers:
1. Prototype the Finish Early and in Context. Don’t evaluate finish samples on a desk. Create mock-ups that can be held, assembled, and subjected to real-world conditions (oils, solvents, repeated insertion).
2. Quantify the “Feel.” Move beyond subjective terms. Work with your machining partner to correlate Ra (roughness average) and Rz (mean roughness depth) values with user feedback. Establish a library: “Our ‘Premium Grip’ finish is defined as Ra 2.0 – 2.5 µm with a specific abrasive flow process.”
3. Design for the Finish. Incorporate transition radii between finish zones. Avoid sharp corners that will polish unevenly or trap media. Remember that certain textures can affect the apparent strength of a part—a fine, linear grain can visually accentuate a seem line, making it look like a crack.
4. Audit Your Supply Chain’s Capability. Not all shops have the expertise or patience for custom surface finishing for plastic components. Ask for detailed process sheets and samples from their portfolio that match your complexity. Do they understand the material science, or are they just following a recipe?
The Future is Textured by Data
The frontier of this field is digital texture mapping and automated adaptive finishing. Imagine a 5-axis CNC machine not just cutting a shape, but using a database of tactile profiles to apply varying finishes across a single part in one automated setup, verified by in-line laser surface scanners. We are moving from artisanal craft to engineered, repeatable science.
The surface is the product’s handshake with the world. By treating custom surface finishing for plastic components as a core engineering discipline—one that balances hard data with human perception—you transform a final manufacturing step into a foundational competitive advantage. Don’t just finish the part; define the experience.