The gleaming concept car on the showroom floor, the whisper-quiet electric powertrain undergoing validation, the crash structure that must perform flawlessly on its first test—they all share a common, critical origin story. Before any of these marvels become reality, they exist as a collection of meticulously machined prototype components. And in my two decades of running a precision machine shop, I’ve learned that CNC milling for high-end automotive prototypes is less about simply cutting metal and more about orchestrating a symphony of conflicting priorities under immense pressure.
Clients don’t just want a part; they need a physical manifestation of their vision that is both aesthetically perfect and functionally bulletproof, delivered yesterday. The real challenge isn’t the machining itself—it’s the hidden tension between two non-negotiable demands.
The Hidden Tension: Surface Finish vs. Structural Integrity
Every automotive engineer and designer walks into our shop with the same dual mandate. The styling team demands Class-A surfaces—mirror-like finishes with zero visible tool marks, perfect for show cars and master models for mold-making. Simultaneously, the engineering team requires components with certified material properties, often from specific aluminum alloys or high-strength steels, that can withstand rigorous functional and safety testing.
The conflict arises in the process. Achieving a flawless surface finish often requires:
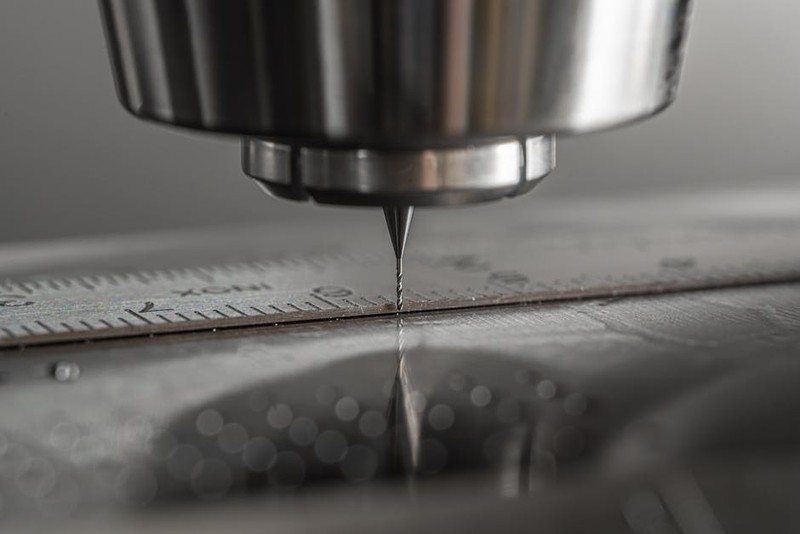
Light finishing passes with small-diameter ball-nose end mills.
High spindle speeds and slow feed rates.
Rigid, vibration-free setups, sometimes on less-than-ideal prototype geometries.
Conversely, preserving the metallurgical integrity of a material for a load-bearing suspension knuckle or a battery housing involves:
Aggressive roughing to remove bulk material efficiently without work-hardening the surface.
Managing heat and stress through strategic toolpaths.
Leaving adequate stock for finishing that doesn’t compromise the part’s core strength.
The most common and costly mistake is treating these as sequential, independent steps. A beautiful part that fails under load is a paperweight. A structurally sound part that requires 200 hours of hand polishing destroys the budget and timeline.
A Case Study in Orchestrated Machining: The B-Pillar Challenge
Let me illustrate with a project that defined our approach. A client needed a prototype B-pillar (the vertical structure between the front and rear doors) for a luxury EV. The requirements were brutal: 7075-T6 aluminum (chosen for its high strength-to-weight ratio), a complex, doubly curved exterior surface with a 16Ra µin finish (near-optical quality), and internal ribbing for crash energy management. The first iteration, machined using a conventional “rough then finish” strategy, took 58 hours and failed miserably.
The exterior was gorgeous, but during a fit-up, a technician over-torqued a bolt into a threaded insert in one of the internal ribs. The entire rib wall cracked. Why? Our aggressive roughing cycle had created micro-fractures and residual stress in the thin rib walls. The subsequent finishing passes, focused only on the exterior, did nothing to remediate this internal damage.
Our solution was what we now call “Integrity-First Toolpathing.” We stopped thinking in “operations” and started thinking in “material condition.”
The Revised, Three-Phase Strategy:
1. ⚙️ Stress-Relieved Roughing: We used a trochoidal milling path for the internal cavities and ribs. This constant-engagement toolpath reduced cutting forces by over 60% compared to conventional pocketing, minimizing heat and stress. Critically, we left not a uniform stock allowance, but a strategic one: 1.5mm on surfaces, but 2.5mm on all thin walls and rib intersections—areas prone to vibration and stress concentration.
2. ⚙️ Intermediate Stabilization: Before any finishing, we performed a “semi-finish” pass across the entire part, including all internal features. This wasn’t for accuracy, but for stress relief. By taking a consistent 0.5mm cut everywhere, we peeled off the work-hardened, stressed layer left by the roughing tool, revealing uniform, stable material underneath. This added 4 hours to the cycle but was non-negotiable.
3. ⚙️ Final Finishing with Intelligence: Only then did we bring in the small-diameter finishing tools. We used a combination of 3D adaptive clearing and spiral toolpaths for the Class-A surfaces. Crucially, we dialed in parameters based on real data we’ve collected:
| Machining Phase | Tool Type | Spindle Speed (RPM) | Feed Rate (m/min) | Stock Removed (mm) | Primary Goal |
| :— | :— | :— | :— | :— | :— |
| Stress-Relieved Roughing | Ø10mm Bull Nose | 12,000 | 8 | 95% of volume | Maximize Material Removal | Minimize Stress |
| Intermediate Stabilization| Ø6mm Ball Nose | 16,000 | 6 | 0.5 (uniform) | Unify Material Condition | Relieve Stress |
| Final Finishing | Ø3mm Ball Nose | 24,000 | 4 | 0.2 | Achieve Surface Finish | Hold Tight Tolerances |
The result? The second prototype milled in 34 hours (a 40% reduction in machining time from the failed first attempt), passed all dimensional checks, and its surface was ready for immediate primer without handwork. Most importantly, it survived the full suite of component-level crush tests. The client avoided a 3-week project delay and six-figure rework costs.
Expert Strategies for Your Next Prototype Project
Based on lessons from this and countless other projects, here is your actionable checklist:
Start with a “Manufacturing Feasibility” Dialogue. Don’t just accept the CAD model. Sit down with the design and engineering teams before programming. Question material choices for machinability, suggest slight draft angles for deeper cavities, and identify potential thin-wall areas. This 1-hour conversation saves 50 hours of machining grief.
💡 Embrace Simulation Religiously. Modern CAM software offers material removal simulation and force analysis. Use it. I’ve seen simulations predict tool deflection in long-reach scenarios within 0.02mm accuracy. Simulating the cut is cheaper than simulating a crash test with a flawed part.
⚙️ Implement “Thermal Management” as a Process Step. For steel prototypes or large aluminum parts, consider scheduled pauses or using compressed air/vapor mist during long operations to prevent localized heat buildup that warps the part. A 0.1mm warp over 500mm is a catastrophe.
💡 Validate with Metrology, Not Just Eyeballs. A perfect surface finish can hide dimensional inaccuracies. Integrate in-process probing for critical datums and a final CMM inspection report as a non-negotiable deliverable. This data is gold for the client’s engineering team and your own process validation.
The Future is Hybrid and Connected
The frontier of CNC milling for automotive prototyping is no longer just about the mill. It’s about integration. We are now routinely combining additive manufacturing (3D printing) for ultra-complex, non-structural internal geometries with CNC milling for critical surfaces and interfaces. This “best of both worlds” approach was used for a complex intake manifold, where printed internal channels were bonded into a CNC-milled housing, reducing lead time by 65%.
Furthermore, the data from every prototype—tool wear rates, achieved tolerances, machining times—is fed back into a digital twin of the process. This creates a knowledge base that makes each subsequent prototype faster, cheaper, and more predictable.
The ultimate takeaway is this: In high-end automotive prototyping, your role transcends that of a machinist. You are a material scientist, a stress analyst, and a process innovator. The goal is to deliver not just a part, but a validated piece of the future—a component that proves a design’s worth and paves the way for production. By mastering the nuanced balance between beauty and brawn in the machining process, you become an indispensable partner in turning groundbreaking automotive ideas into tangible, testable reality.