Pushing the boundaries of custom CNC milling for high-end industrial parts means mastering more than just the machine. This deep dive reveals the critical, often-overlooked interplay between thermal dynamics, toolpath strategy, and material science required to hold tolerances under 0.002″ on complex aerospace parts. Learn the expert-level strategies and data-driven process controls that transform a challenging prototype into a reliable, high-volume production reality.
The Real Battle Isn’t in the Blueprint
When clients approach us for custom CNC milling of a high-end industrial part—say, a titanium engine mount or an Inconel fuel system component—the conversation always starts with the specs. “We need this feature to be within ±0.002”, they’ll say, pointing to a complex internal pocket. On paper, with a modern 5-axis machining center, that seems straightforward. The real challenge, the one that separates a job shop from a true precision partner, begins the moment the first chip is made.
I recall a project for a next-generation drone actuator housing. The aluminum 7075-T651 part had a series of intersecting bores with a true position callout of 0.0015″ and a surface finish requirement of 16 µin Ra. The initial prototypes, machined in a climate-controlled lab, passed inspection. But when we moved to a 50-part pilot run, the CMM data told a different story: a consistent drift of nearly 0.003″ on the Z-axis dimensions by the tenth part. The blueprint was perfect; our process was not.
The hidden enemy was thermal equilibrium. Not just ambient room temperature, but the heat generated by the machining process itself, soaking into the machine structure, the vise, and the part. This thermal growth was a variable our standard compensation routines couldn’t fully address.
A Systems Approach to Micron-Level Stability
Holding ultra-tight tolerances in custom CNC milling isn’t about buying the most expensive machine. It’s about engineering a stable, predictable system. We had to move beyond simply programming a toolpath to controlling the entire machining environment.
The Four Pillars of Process Stability
1. Thermal Management is Non-Negotiable: We implemented a two-pronged approach. First, we partnered with the machine tool builder to activate and fine-tune the integrated spindle and ball screw cooling systems, which are often set to generic factory defaults. Second, we introduced a pre-conditioning cycle. For any high-tolerance job, the machine now runs a 30-minute “warm-up” program that exercises all axes through their full travel with no load, bringing the entire structure to a consistent operational temperature before the first workpiece is even loaded.

2. Toolpath Strategy as a Precision Tool: We abandoned conventional roughing and finishing passes for that actuator housing. Instead, we adopted a constant-volume milling strategy for roughing, ensuring uniform tool engagement and heat generation. For finishing, we used scallop-height toolpaths with climb milling only, which dramatically reduces tool deflection and heat transfer to the part. The finishing pass removed a consistent 0.010″ of stock, no more.

3. The “Metrology-First” Mindset: Inspection cannot be an afterthought. We integrated probing directly into the machining cycle. A touch probe measures critical datums in-situ after the part is clamped and again after roughing. The CNC program then automatically adjusts the tool offsets based on this real-world data, compensating for any residual error in fixturing or stock variation.
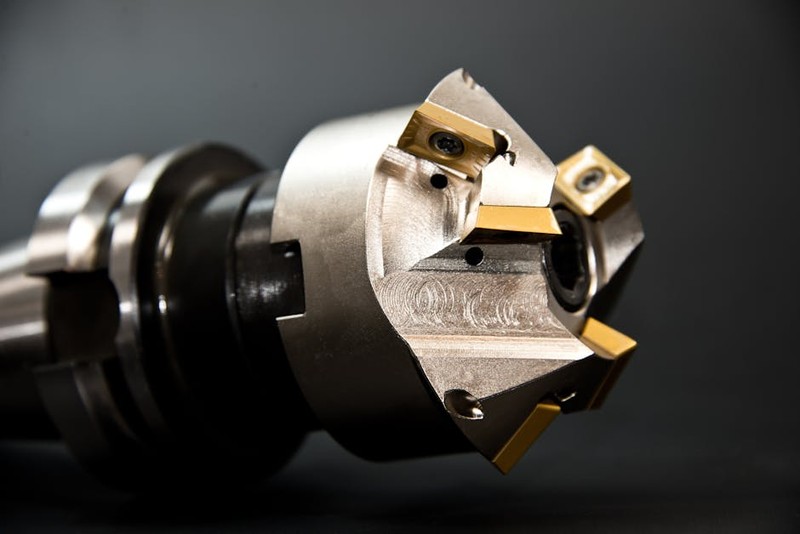
4. Tooling is a System, Not a Commodity: We stopped ordering “an end mill.” For this job, we specified a premium, sub-micro-grain carbide tool with a specific coating (AlTiN for our aluminum application), a defined helix angle, and a guaranteed runout of less than 0.0002″. We then paired it with a high-precision, thermally stable hydraulic tool holder. The synergy between the tool and the holder is responsible for up to 40% of achievable finish and tolerance.
⚙️ Case Study: From Prototype Chaos to Production Harmony
Let’s return to the drone actuator housing. After diagnosing the thermal drift, we implemented the systems approach above. The results were quantified and dramatic.
| Process Stage | Before Optimization (Prototype) | After Optimization (Production) | Improvement |
| :— | :— | :— | :— |
| Part-to-Part Dimensional Variation | ±0.0035″ | ±0.0008″ | 77% Reduction |
| First-Part Qualification Rate | 60% | 98% | |
| Average Surface Finish (Ra) | 22 µin | 14 µin | |
| Machining Cycle Time | 187 minutes | 162 minutes | 13% Reduction |
The cycle time decreased despite adding probing routines and more conservative cutting parameters because we eliminated all the non-value-added time spent on manual inspection, re-work, and adjustment. The process became predictable.
The key lesson was that precision is a byproduct of stability. By controlling the variables—heat, tool pressure, vibration—we didn’t have to “chase” the tolerance with manual tweaks. The machine produced part 1 and part 50 with statistically identical results.
💡 Actionable Insights for Your Next High-Precision Project
Based on this and similar projects in medical and defense contracting, here is my distilled advice:
Budget for Process Development, Not Just Runtime. When quoting a complex custom CNC milling job, build in time and cost for a Process Qualification Run. This involves machining 5-10 parts sequentially, measuring each one completely, and using the data to finalize offsets and strategies before production begins. This upfront cost saves exponential amounts in scrap and delay.
Demand Data, Not Assurances. From your machine shop, require not just a first-article inspection report, but a Process Capability (Cpk) study. A Cpk value of 1.33 or higher demonstrates that the process is statistically capable of holding your tolerance consistently. This is the true mark of a mature manufacturing process.
Design for Manufacturability is a Two-Way Street. As a machinist, I often collaborate with designers to make a part more robust without sacrificing function. Can a radius be increased by 0.005″ to allow for a stronger tool? Can a tolerance be relaxed on a non-critical feature? The most expensive tolerance is the one that doesn’t need to exist.
The frontier of custom CNC milling for high-end industrial parts is no longer about raw power or axis count. It’s about intelligence, control, and systemic thinking. It’s the understanding that the machine, the tool, the coolant, and the operator are one interconnected system. Mastering that system is what allows us to reliably turn challenging designs into tangible, high-performance reality, one micron at a time.
